February 28, 2011

Death Trap

Warning:
Not for the weak of stomach!

Sorry, I really have to put that disclaimer up.  This has some nasty pics, but I have to share.  It is unreal!

So, we worked on removing walls out of the basement yesterday.  Opening up the family room into the old garage.


Doing the Mango hand wave!


And then we removed part of the wall of the storage/junk room.  This area will eventually become our media room.  We love watching movies!


While doing this, we ran into the grossest thing I have seen so far in my life.

A mouse death trap.


This is the after pic.

Doesn't sound so gross?  Just wait.


This was about 3 inches high of just death!  When we removed that piece of sheet rock it about knocked me off of my feet from the smell. 

(Gagging right now!  I can still smell it!  It is engraved into the brain!)

Still not so bad?!....wait!


That is just the death out of that one area.  I started counting and got to about 20 and then just gave up, because they were falling apart in my hand.

(Keeping my vomit down!)

I didn't want to pick it up...but Zippy was getting way too nosey!

Nasty dog!

As we removed more and more sheet rock off of that wall we found more and more death!

This is a Jo Ann's bag filled with the rest of the death.  The kids thought maybe it was 12 or so mice, I said 75...Sir said more like 75 hundred!


It was so nasty!  Some of the mice were still furry and whole, others were decomposing, and others were just bones. 

I live out in the boonies, so we did have a few mice that we knew of.  And every once in a while we would hear one fall in between the walls in the basement and then a few days later we would have a mystery aroma (it was never really a mystery).  I had no idea this was in my walls!

You think less of me now, don't you?!?!?!

Its not my fault!  They are the nasty little rodents that fell into my walls.  How you ask?

Well, they would walk along this area with the air ducts and then just fall to their death!


I'm sorry if this grossed you out.  I just had to share!  It was so unbelievable, I had to document it.

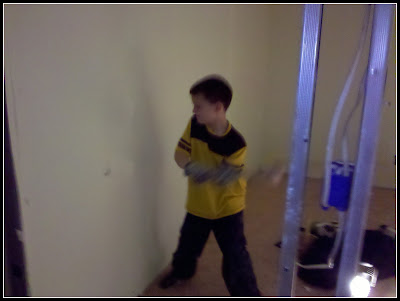
But the kiddos did get to help out with the demo.  Just not the death!


Now, I get to clean up the mess that we didn't pick up last night!  Yay me!

Thanks for coming by.  Hope I didn't scare you off!


February 27, 2011

Basement demo

If you follow my blog, you know that we have been working on our house since last January.

First we added on.  Now, is the renovation time.

This is what we did Saturday after Lil' Sis's last basketball game of the season.  (BTW...she had so much fun playing.  She made one basket in this season, which is awesome!  She doesn't have the power to get that darn ball up in the air.)

I had bought a shelving unit to store my pantry goodies.  And I had to cut pieces of particle board so that my canned items would sit flat.  Why did I have to buy a shelving unit for my pantry goodies you want to know?!

Well, this is why...


This was my pantry/laundry room.  Yep, right off of the kitchen.  That's a great place to traipse dirty undies thru!  MMMM good!

So now, this is what it looks like. 


That's my pile of dirt, nails and plastic anchors that I have to pick up.


We still have to remove the lovely linoleum and all the sheet rock.  But this eventually will become a closet off of the master bathroom and a new pantry for my kitchen!  A functional pantry!

Just wanted to update you all.  Thanks for coming by!


February 24, 2011

Flea Market Frame-Updated

Updated!!

I'm sorry, but I forgot to post pics of the frame with magnets on it.  Please scroll to the bottom to see them.  Thanks for pointing it out for me!  And Thanks for all the comments!

I found this bad boy at a recent flea market trip.  I loved the details on the frame but hated the gold paint.  It needed rescued!


So I brought it home and whipped out my trusty can of spray paint and went to work.  It took a few layers to cover that gold.  It just absorbed the paint. 


Then I took a piece of particle board that I had and cut it to fit the opening of the frame.


I used my new Dremel Trio that I got for Christmas to cut it.


First time that I used it, but I'll get the hang of it.  See, my cut isn't exactly straight, but it will be hidden by the lip of the inside of the frame.


Then I whipped out my trusty can of glaze and set to work on the frame.  I love glazing!  It is great to distress items.


Once you get all the glaze on it, you have to wipe it right back off.  I know, sounds redundant but it works.


I wanted it to be like a huge memo board, but didn't want to make push pins for it.  So, I pulled out the Magnetic Paint and got to it.


It says that you only need to put 3 light coats onto it, but I wanted the magnets to really hold, so I ended up putting about 6 coats on.

Now, I took the particle board and sprayed a coat of Satin Nickel onto it.


 I thought that I wanted it to be like a piece of sheet metal.  And yes, I know Aimus could very easily have cut a piece for me, but I wanted it to be something I made all by my little self.  (No offense Aimus!)


I'm thinking that I want something with a little more texture.  Hmmm...

So...I let this thing sit for a week and kept walking by it, and thinking, I really don't like the look.

After bowling yesterday (yes, I bowl!  Don't judge!) I ran by Jo Ann's and looked at all of their material.  And I fell in love with this turquoise damask!  Beautiful!

I took my board and laid it on top of the 1/2 yard damask that I bought.  Then I took the excess material and started stapling around the edge.  (Just one though!)


Then, when I got to the corner, I cut the material from the corner into the corner of the board.  Like this.


Then, I took the extra material that I had just cut and folded it under.  I then stapled it down like so.


Next, I did the same thing to the other side.  It should look like this.  I like nice finished corners even if I'm not going to see it.


Then I did the opposite side.  Pull tightly and staple first, then I cut the corners and did them.  Next I did the other two sides.  Making sure to pull the material tightly.  Don't want to have any ripples in your material.


Flip the board over and it looks like this.


Then I just stuck the newly covered board into my frame.  Stapled it into place.  (I'm using a staple gun for all of my stapling.)

I adore it!  I think it turned out wonderfully!


I am very happy with how it turned out!  Thanks for stopping by today.


I've linked over at Vintage Revivals for look what I found Friday.


I've also linked to Sugar Bee-Craft Edition.


And I linked to Krafty Kat


Updated photos!!


Related Posts Plugin for WordPress, Blogger...